Thursday, October 24, 2013

The Process of Custom Design: Part III. Casting.


This the third entry in a four-part series on the process of custom designing a piece of jewelery.

Now that the wax model or CAD representation has been accepted by the customer, it is time for casting.

Casting is a process by which a liquid material is poured into a mold (or a flask) that contains a hollow cavity of a desired shape, and then is allowed to solidify. Casting is a 6000 year old process. The oldest surviving casting is a copper frog from 3200 BC. For more information see Wikipedia.

The most common method of casting is by lost wax. First a channel called a sprue is attached to the wax model.  It is also made of wax. On more complicated pieces, multiple sprues of varying diameters are used. Next the model is place upside-down inside a flask and a heat resistant plaster is poured all around the piece -- encasing every minute detail. A vacuum is used to make sure all the bubbles are removed. After the plaster sets, it is put into a kiln and heated in a controlled manner to melt out the wax. Thus the term lost wax casting: a perfect negative of the piece is made and the wax destroyed.

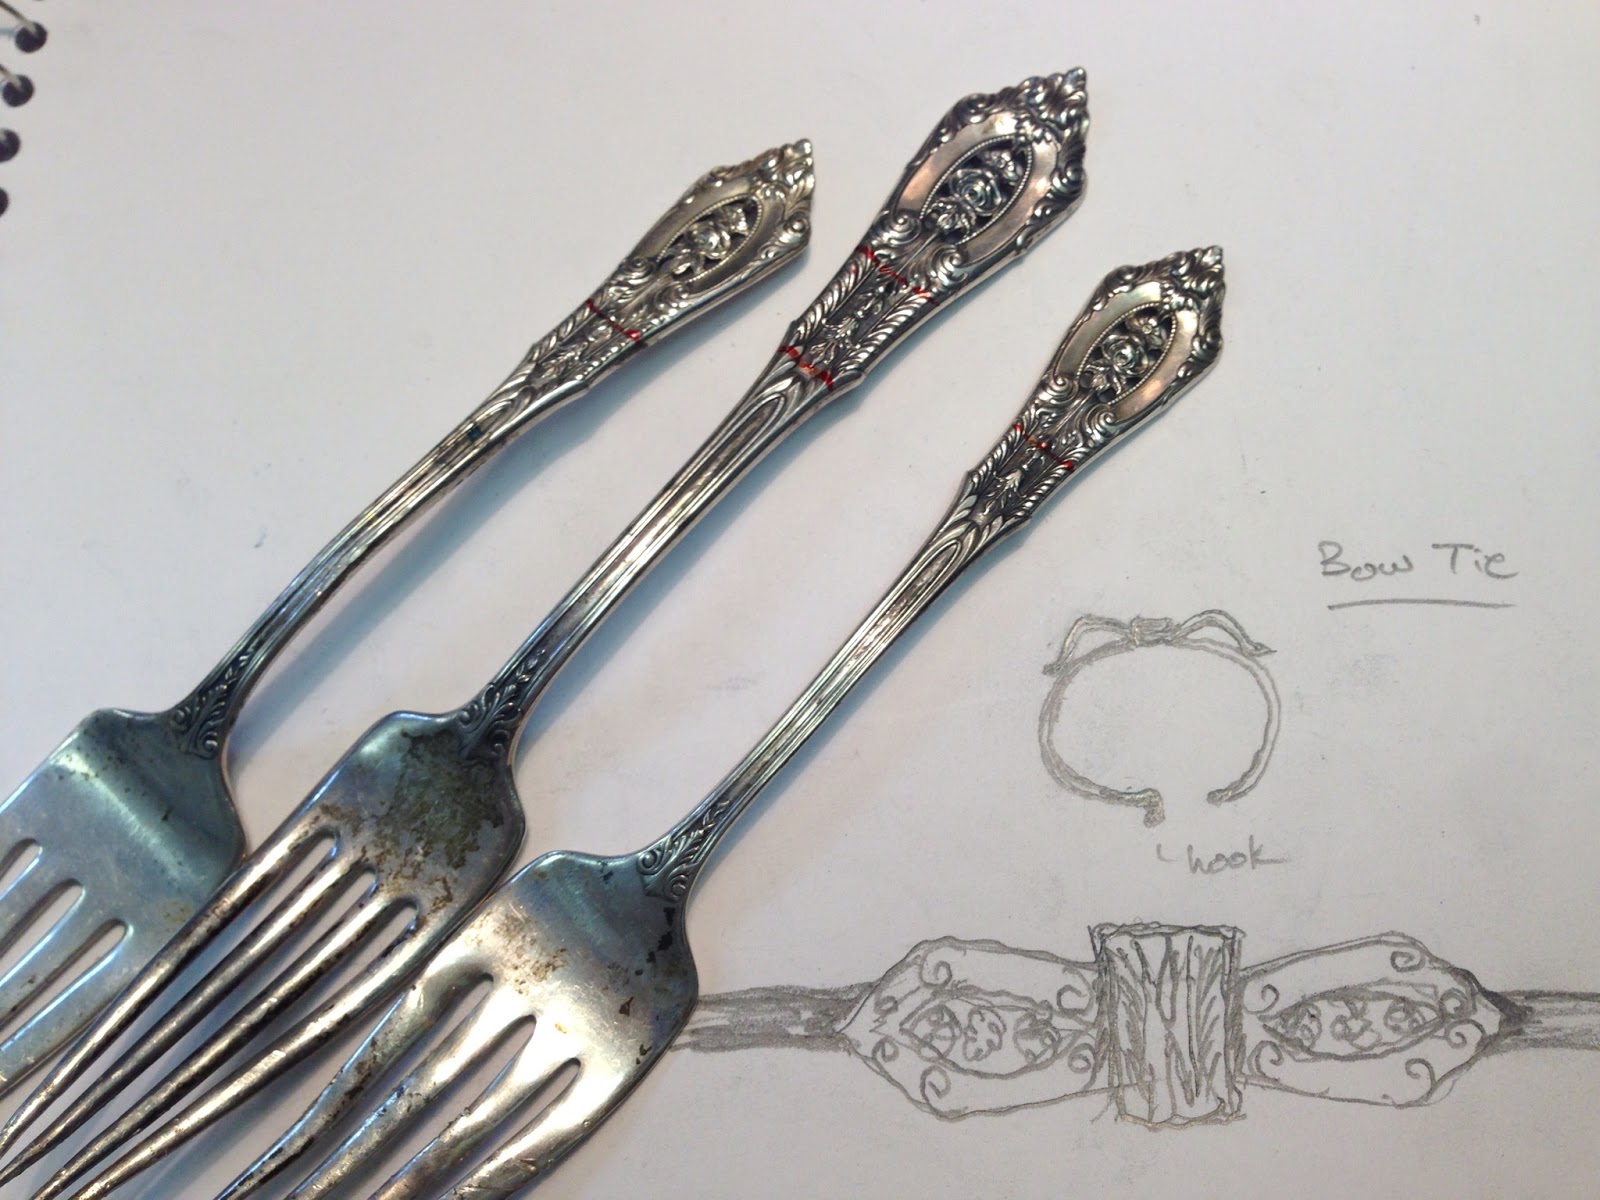
Custom pieces when they come out of the flask.  Notice the sprues.

After proper heating in a kiln to remove the wax, the flask is ready to be filled with a precious metal. After the metal cools down and hardens, the flask is submerged in water to loosen the plaster and out comes the piece, sprues and all.

In addition to lost wax, there are several other casting methods.  Here are a couple:

Vacuum casting is used with silver and gold alloys only. A vacuum is created under a flask and molten metal is poured into the opening. The vacuum helps the metal flow into all the spaces.

Centrifical casting is used with most metals including platinum. This can be quite exciting to watch because a special machine is used to shoot the molten metal into a flask at very high velocities to ensure a complete casting.

Tony, our custom jeweler, demonstrating centrifical casting.
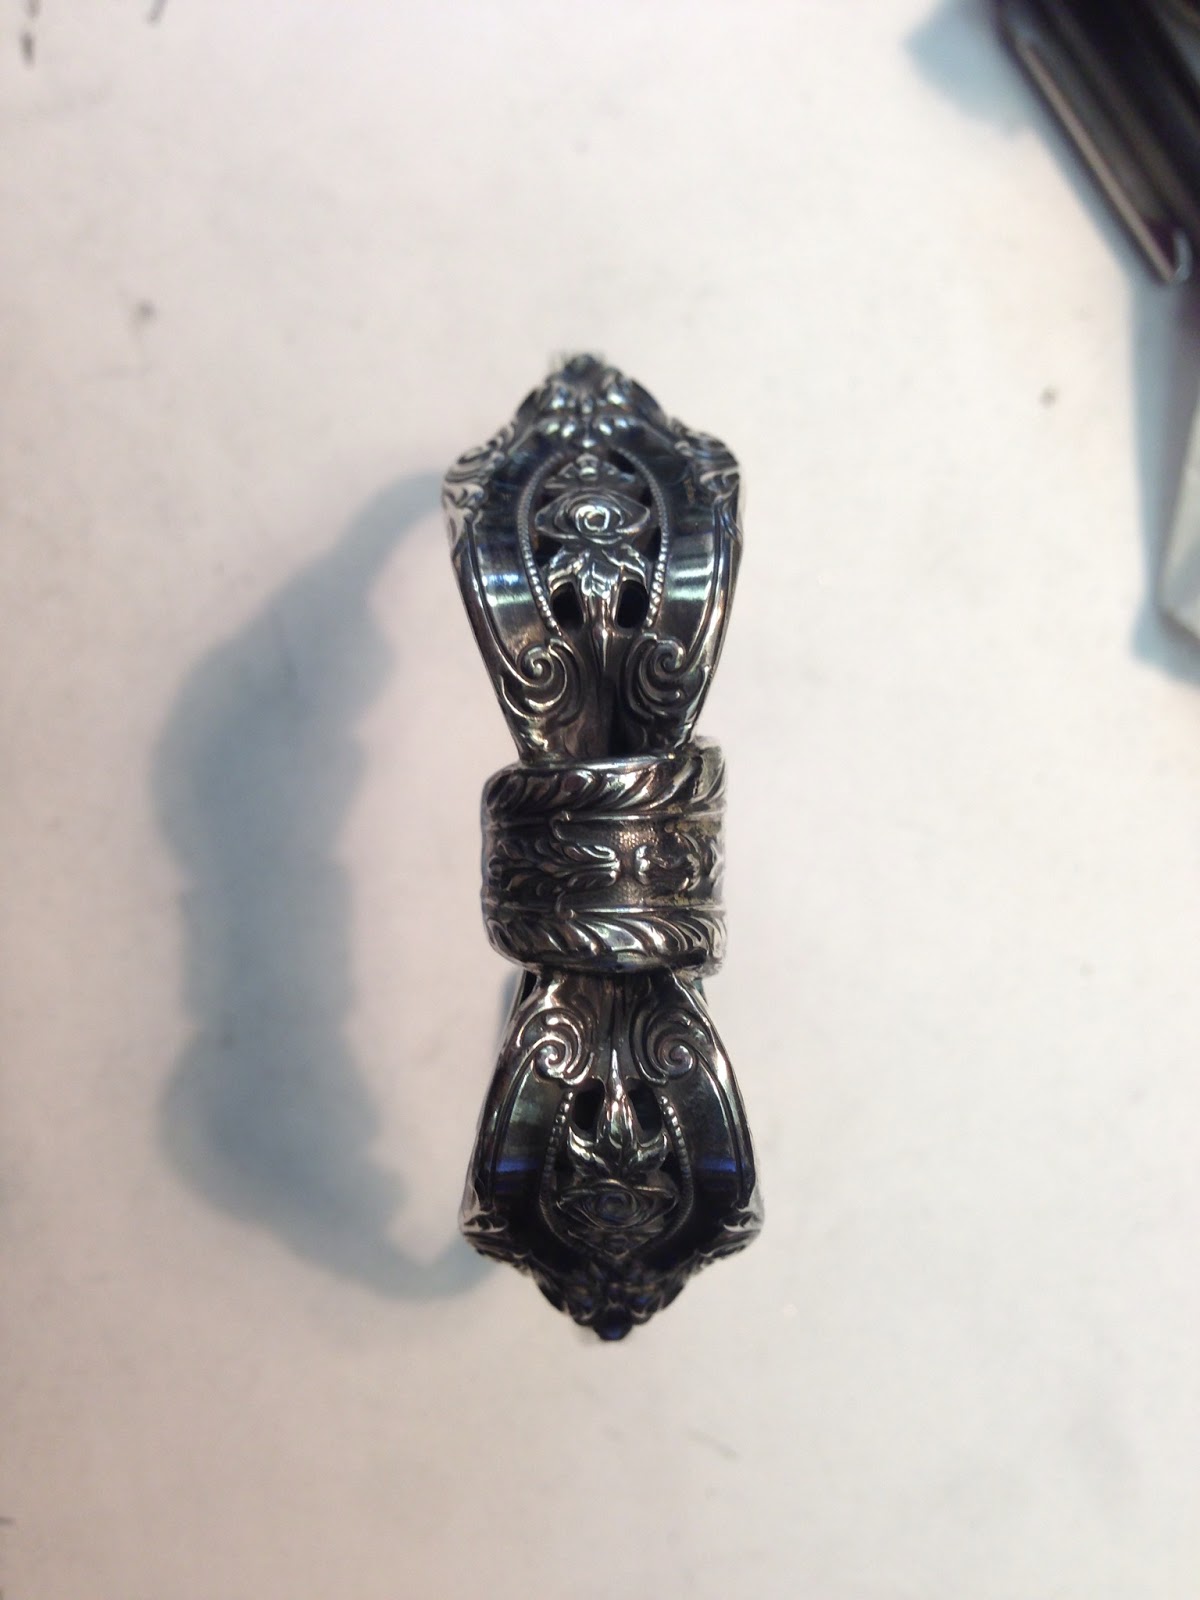
The final step is to cut off the sprues and finish the piece. Finishing is the subject for the fourth and final part of this series.

Wednesday, October 9, 2013

The Process of Custom Design: Part IV. Finishing.

This the fourth and final entry in a four-part series on the process of custom designing a piece of jewelery.

Once the sprues are cut away, the resulting rough areas on the custom piece are filed flush to the surface of the metal. If the piece is a ring, then Tony will clean the inside with a sanding drum and check for correct size.  The entire piece is inspected for defects.

Testing a ring just back from casting to make sure the stone will fit correctly.  Notice the rough edge on the shank where the sprue was cut away.

The ring when it has been finished.


Next it is methodically cleaned.  This step is also the process of getting the surface to the point where it is ready for polishing and includes sanding.  Any concave areas are sanded with a mandrel, while convex areas are sanded with a sanding stick. In sanding (as well as filing and polishing), there is a progression from using coarser tools to finer tools. A rubber wheel impregnated with an abrasive is used on delicate areas. Pieces with hard-to-reach areas are placed in a magnetic tumbler.

Now it is time for polishing. Jewelers will always bring a custom piece to a high polish stage in the finishing process, even if it will eventually have a matte finish. When polishing Tony uses buffing compounds, again from coarse to fine, and a variety of other buffing materials such as muslin, felt, and bristle. He will continue polishing until a mirror finish is achieved.

Sometimes when pieces come back from casting, they need to be assembled. There are two major techniques to joining metal: soldering and laser welding. Soldering is a must with two different colors or types of metal. If joining pieces of the same metal together, laser welding can be used.  Solder employs using the same carat metal but alloyed differently to result in a lower melting point than the parent metal. Solder is usually designated hard, medium, and easy. These designations refer to the melting point and are particularly important in complex pieces that require several solders. Tony will always work from hard to medium to easy.  This prevents any previously soldered joints from melting apart. In laser welding, the same metal is used to join parts together. For example, 14k yellow gold laser wire would be used to weld 14k yellow gold parts together.

This yellow gold pendant has two components.

The finished pendant after the pieces were laser-welded together.


Once again it is time for ultrasonic cleaning and a high pressure steam to remove all traces of polishing compound. If there are no stones to set, the piece is finished.

If there are stones to be set, the first step is to prepare a seat.  A seat is a ledge or a shelf upon which the stone rests. Metal is folded over the stone to hold it place. This is a rough way of describing setting.  There are at least twelve different techniques for setting stones but in each the jeweler must create a seat and then "fold metal over the stone."

A mounting ready for stones.

See how the metal is folded over to keep the stones in place?


After the stones are set, the piece is polished and cleaned again. Any engraving that was specified is completed and -- viola -- a beautiful custom-made piece of jewelery unlike anything belonging to anyone else anywhere.

This concludes our series on custom design.  We hope you've enjoyed learning about the process!

Saturday, September 7, 2013

Now on Display in Grimball Jewelers' Windows

Peep into our windows or come in for a closer look at the beautiful mosaics of Mary Kramer.   Mary is a Chapel Hill artist who has developed her passion for this ancient art for over fifteen years.  She is a member of the Society of American Mosaic Artists and her work was displayed at the Mosaic Arts International Exhibition in both 2010 and 2012.


Mary captures an image in thousands of fragments of stained glass and semi-precious stones. Each creation is a labor of love requiring hundreds of hours of patience and intricate artistry.


You can visit Mary's online portfolio at Mary Kramer Design Studio, but the beauty and character of her mosaics are best appreciated in person -- a photograph just cannot capture the incredible complexity and detail of her work.  Her mosaics will be on display at Grimball's during the month of September.

Wednesday, July 17, 2013

Beyond the spoon ring

Recently we took in a few pieces of silver badly damaged by a garbage disposal.  The tines were interestingly twisted but the handles were in excellent shape and made in a beautiful pattern.  Instead of sending them to the refinery, we sent them to Tony to see what he could do.

Take a look.


Saturday, June 29, 2013

The Process of Custom Design: Part II. Modeling.

This the second entry in a four-part series on the process of custom designing a piece of jewelery.

Once a design  is approved, Tony has to decide whether to create a model of the piece using the lost wax process or CAD (computer aided design) .

Lost Wax Process

The lost wax process works well for organic designs and unusual settings. When modeling a piece of jewelery using this process, Tony applies either subtractive or additive techniques. An example of the subtractive approach is when he begins with a block of wax and carves a ring from it by removing the wax in a systematic manner to get to the desired shape and design. When using an additive approach he starts with a smaller piece of  wax and builds it up with a wax pen to get the desired shape. 

And in some situations he uses both subtractive and additive methods.

A wax model temporarily fitted with the stones that will be set in the actual ring.


The ring is just about ready for the stones.


The finished ring that was modeled using the lost wax process.  Gorgeous.


CAD

Tony works with CAD when the piece requires perfect symmetry, intricate details, or numerous stones. He begins by measuring any stones to be used as well as any relevant body parts (finger size, wrist circumference, etc.).  He designs and builds the CAD model based on these two important factors. After the piece is finished in CAD, he will send the digital file to a vendor that will either use a computer to "grow" the piece or that mills it out from a solid section of wax. Another advantage of CAD is that the model can be used to make one or one hundred identical pieces. (Example: bracelet link)


A ring is designed in CAD.


The finished ring that was modeled using CAD.


Fabrication 

Occasionally, the design requires outright fabrication, directly shaping metal into the final form.  In this situation the modeling process is bypassed entirely. This method involves melting the metal into an ingot and using a rolling mill to make a sheet or wire.  The metal will then be shaped and forged in to the components needed to complete the job.


This ring was not modeled using the lost wax process or CAD.  Instead it was fabricated directly from metal.


The wax model or CAD representation is usually presented to the customer for approval.  Then the next step is Casting and that is the subject for the third part of this series.

Saturday, June 1, 2013

The Process of Custom Design: Part I. Design.

This the first entry in a four-part series on the process of custom designing a piece of jewelery.

Custom design is an important element of our business at Grimball Jewelers and a service we are pleased to offer our treasured clientele. Many people know right from the start that they want a custom piece of jewelry but sometimes it's not until a customer has browsed our collection and spoken with a member of our sales staff that it becomes clear that they will need a piece created especially for him or her.  Once the need is recognized, it's time for a consultation with our designer Tony.
 
During the consultation, Tony asks a variety of questions to determine the parameters for the piece.


  • Is the customer looking for something modern or traditional?
  • If gemstones are to be used in the piece, is there one stone that will be of primary importance or are there several stones to consider and arrange in a pleasing manner?
  • How will the stones be set?  If the customer leans toward a modern style, Tony typically recommends bezel  or channel setting while a traditional style usually looks best with bead or prong setting.


  • Will the piece be symmetrical or asymmetrical?
As the consultation progresses, Tony does a bit of counter-sketching to demonstrate different ideas about the piece.  Once in a while, he will get lucky and produce the  perfect design on the spot.  But usually he schedules a follow-up where he will present the customer with four or five design options.  When the customer reviews the designs usually one of the following occurs:


  • One of the designs is just what the customer wants.
  • The customer likes elements from two or more of the designs and a new design is required that combines those elements.


  • The designs help clarify what the customer wants or does not want but still need refining.
It's nice when it works out easily but sometimes it takes a bit of extra work to get to perfection. Once a design is approved, the next step is Modeling and that is the subject for the second part of this series.

Below you will find a sample of Tony's counter sketches and design proposals.  Enjoy!

(And if you'd like to see a small portion of custom pieces by Tony, check out our Pinterest account.)


Hers and His Wedding Bands

Band designs

Domed Rings

Gold Ring with Semi-precious Stone

Spider Pin/Pendant with Gemstone in Various Settings

Friday, May 3, 2013

Prepare to be amazed by this Victorian jewelery from the Singer Collection

This posting in one in a series featuring the Singer Estate Collection, which we will be hosting on May 4th, 2013.  It is an unique opportunity to acquire an antique piece of jewelery. 

Here are some breath-taking examples of Victorian jewelry from the Singer Collection.  Even if you're not in the market to buy jewelery right now, please stop by tomorrow, May 4th, 2013,  just to take a look at what is sure to be an amazing display of rare pieces.  Please keep in mind the pictures below are to show you examples of previous offerings from Singer and most likely won't be available tomorrow. 


A Little about Victorian Jewelery

From the Gemological Institute of America's Jewelery Essentials:
 

Victorian jewelry encompasses a variety of styles that were popular during
the rule of England’s Queen Victoria (1837 to 1901). These styles
typically include one or more of the following:
• Ornate matching sets of gemstone-set jewelry
• Gemstones such as diamonds, emeralds, coral, amethyst, garnet,
turquoise, and tortoise shell
• Sentimental or romantic symbols
• Ornamental locks of human hair
• Mourning jewelry made of jet and other black materials
• Cameos
Some Victorian jewelry idealized past cultures by reviving Greek,
Roman, and Egyptian jewelry styles, among others. Other revival themes
included Gothic, Renaissance, and Archeological (inspired by ancient
Assyrian, Greek, Etruscan, Roman, and Egyptian styles).